Pate Brisée 1
Pate Brisée
Pate Brisée 1
Pate Brisée is a classic French tart form, it requires a light hand and produces a crispy and layered dough. It’s my go to recipe for tarts of all kinds.
Enough dough for 1-23 or 24 centimeter tart pan or 1-12 inch tart pan. This will yield a bit extra that can be reused for cookies or couple of small tarts. This will also give you enough for 6-8 small tart shells.
This is a great recipe for all open face tarts and custards. Leave out the sugar and it works well for quiche and savory tarts. You can add a small hand full of finely chopped nuts as well.
For a double crust recipe that perfect for covered pies go to Pate Brisée 2
Pate Brisée 1
Making pie crust is really easy but it makes many people nervous. My suggestion is to make it a few times over a couple of weeks and you will become as proficient as I am. Practice really does make perfect.
Ingredients
- 315 grams flour weighed and sifted with
- 1 tbsp sugar plain white and
- ½ teas salt
- 150 grams butter good quality
- 3/4 small egg beaten
- 3-4 large spoons milk
Substitutions
- 110 grams butter cold
- 50 grams lard (ister i svensk) cold
Instructions
- Before beginning please read all my notes below.
- Have the dry ingredients weighted and all sifted together in a bowl large enough to hold everything. Sifting makes for a lighter pie crust.
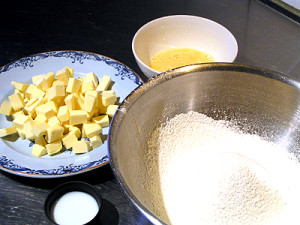
- The the butter, egg and milk need to be cold so measure out these second. The butter needs to be cut up into pea size cubes.
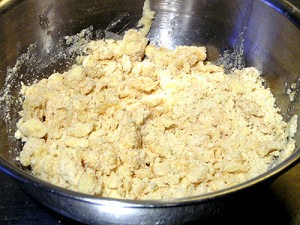
- Take the cold butter that you have cut up and add it to the bowl. With the tips of your fingers and avoiding the use of your palms, rub the flour into the butter until it becomes crumbly and should resemble corn flakes Work quickly to avoid the butter melting. Be light with your finger and toss the flour as you work to keep as much air in the flour as possible.
- When the butter is incorporated add the egg and milk and with a fork mix it in. With your hand reach into the bowl and gently bring all the mixture together.
- Tip the contents of the bowl onto your work surface and bring the pastry together. Pushing it into a disk as shown. If it won't hold together add another tablespoon of milk. You will probably need to use the heal of your hand to give a final push or two to really incorporate the butter. If you find that you have little bits of butter showing that is fine. Don't over work it at this point. It will be getting warm and a bit sticky by now. So lightly dust it and turn it over and dust the bottom as well.
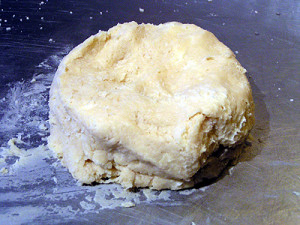
- Shape it into a ball and flatten into a disk, wrap lightly in cling film or place in a plastic bag and put it into the fridge to rest for at least one hour.

- Remove and leave on the counter for 10 to 15 minutes to make it a bit easier to roll it out.
- Dough can be frozen up to 1 month; thaw in refrigerator overnight before using.
- This can of course can be made in a food processor but remember over working the dough will kill it so be gentle when you pulse and do it only enough to bring the mix together.
Notes
Tip: You really only want to have just enough liquid in the mix to bring it all together. I think that this is where most people have problems. If the dough is too wet it will be heavy and difficult to roll out later. If it's to dry it will just crumble and break up as you are rolling it out and if its too warm it will stick to everything. Letting it rest in the fridge helps with that. Resting it also allows the flour to hydrate and the gluten in to relax helping you to roll it out later.
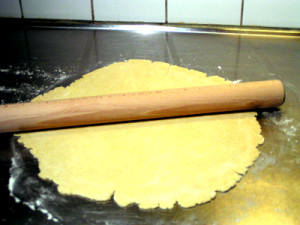
Rolling out the dough: Your tart pan should be buttered and lightly floured before you begin rolling out the dough. Take the dough from the fridge and let it sit for about 10 minutes. On a cool work surface take the dough and dust it lightly including your rolling pin and work surface.
It will be hard and you might have to put your shoulders into it but it will roll out. You can at this point wait for a few minutes but as soon as the dough begins to roll out more easily you will find that you need to be quick or it will get too warm to easily handle as it gets thinner.
The technique for rolling is to roll it out a bit in one direction then give it a quarter turn and roll again in the same direction. Continue this method, roll then a quarter turn until the dough is the size and thickness you desire. This method insures that you get a circle instead of an oval or who knows what! Start small and as the dough gets warmer it will be easier to roll. Flip the dough over from time to time, this will also help with the rolling. At least I find it does.
Roll the dough to a thickness of 3 millimeters or 3/16 of an inch. I admit that this can take a bit of practice but after you have done this recipe 3 or 4 times it will be completely natural to you.
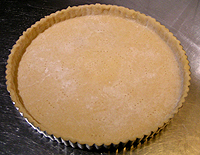
Dust off any excess flour with a pastry brush and line your tart pan with the dough.
Some people find it a bit easier to do this by rolling the dough around the rolling pin then positioning the the rolling pin over the tart pan and letting the dough fall back into the pan. Avoid any stretching of the dough while you do this.
Push the edges of the dough into the corners of the tart pan, pushing the edges down to thicken the sides of it slightly and making a nice fit. This thickening up of the sides slightly will help later after the tart is baked when trying to slice it. Trim off the excess dough by pushing down with your finger in an outward direction. If your using this dough in another type of baking pan you may crimp the edges of it. In a tart pan it isn't necessary.
If the dough splits or cracks while you are putting it into your tart pan don't worry. Wet your finger with a little water, dampen the dough where its broken and make repairs by pressing the dough back together. Do the same for any holes you might have.
At this point put the pie crust back into the fridge to rest for about an hour, this will help to stop it shrinking during the baking.
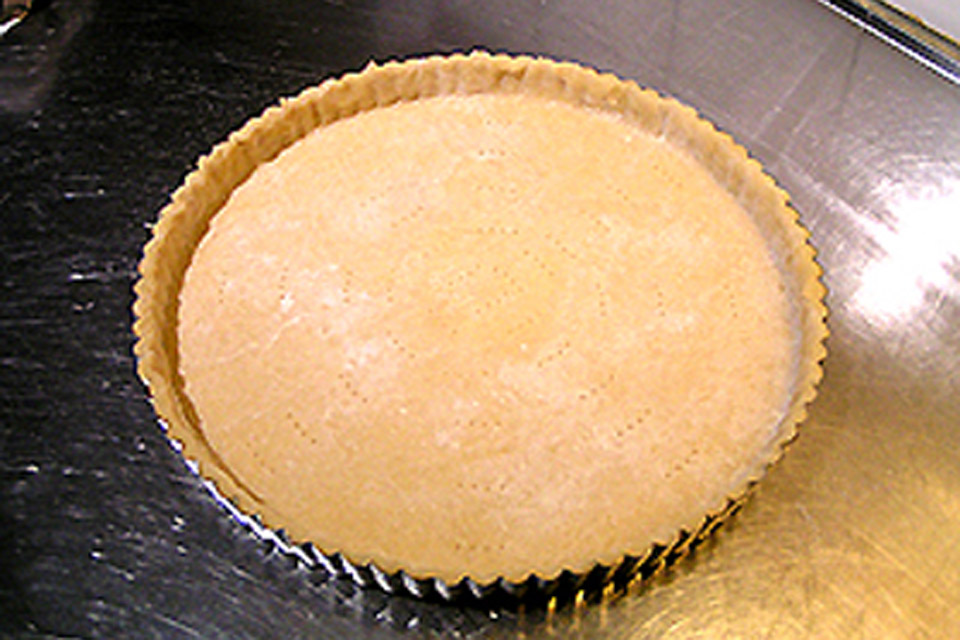
Baking the tart case blind (empty) Many recipes call for a fully or partially baked tart shell. After the dough has been rolled out and allowed to rest for an hour in the fridge, prick the bottom of the tart with a fork all over to allow steam to escape during baking which stops the center of the pie shell from rising up like a dome during the baking, (this is called docking). Place a piece of baking parchment or aluminum foil (slightly larger than the tart pan) in the bottom of the uncooked tart shell. Pour in a couple of cups of dried uncooked white beans (kidney or navy will do, rice also works). Distribute them evenly over the bottom and into the corners of the unbaked pie shell. These will stop the pie crust from shrinking and will also stop air from lifting up the bottom of the shell during the baking process. We want a thin and completely flat crust when we are done. I have been using the same old bag of beans for the past 20 years.
For a partially cooked shell which you usually need for quiches, custards and some savory pies, bake at 200 degrees for 15-20 minutes minutes.
For a fully cooked shell which you would make for a classic strawberry or banana tart, bake for 20 to 25 minutes, at 200 degrees, remove from the oven and take away the parchment and the beans. Return to the oven and bake for a further 8-10 minutes or until the pie shell gets a lovely even light golden color and is cooked through. Keep an eye on it at this point -
Remove from the oven and leave to cool on a cooling rack.
You can make this in the morning and fill it in the afternoon. Which makes it handy if your filling is a bit wet.
Note: Baking times vary from oven to oven especially if you have a convection oven, begin checking from the earliest times given here.
Nutrition
Calories: 3600kcalCarbohydrates: 258gProtein: 40gFat: 268gSaturated Fat: 152gCholesterol: 732mgSodium: 4221mgPotassium: 500mgFiber: 9gSugar: 19gVitamin A: 6700IUCalcium: 180mgIron: 15.3mg
Tried this recipe?Let us know how it was!
Leave a Reply